Learning to stay on the bus

When I started my blog, I was in part looking for a creative outlet that could serve as a substitute for photography.  Sure I’ve liked and used fountain pens for years, but it never occurred to me that I would start collecting them in earnest, or writing about them, or (here was the big surprise) finding that other people might actually want to read what I had to say about them.

Black and white photo of a Hosta flower

Hosta flower

I’ve never really taken to digital photography beyond the acceptance that these days it’s a convenient way to take photographs.  And while I still can’t be persuaded to spend hours in front of a computer tweaking images, I never had that problem standing for hours in a cramped, darkened space under a red safelight making prints in a darkroom.  Maybe it was the smell of the chemicals, but I’d like to think it was the childlike wonder of watching an image gradually materialising on the paper as it rocked gently in the tray of developer and thinking “I did that”.  Of course, it applied equally when things went wrong, but I’m pleased to say that this sense of magic has never gone away.

Black and white photo of a waterfall

Waterfall (Cwmorthin, North Wales)

I can’t pretend to be a very good photographer but I need to be able to believe I still am one.  Unfortunately, the time needed for taking and making photographs has not been compatible with work and family commitments in recent years.  I’m hopeful that one day this will change, and that when it does it will actually still be possible to buy film and photographic paper and get back to something that I really love.  In the meantime, my darkroom is mothballed and my beloved Sinar Norma and Mamiya RB67 are more like ornaments in the corner of a room than tools of the trade.  All the gear – no idea when I’m going to get to put it to good use…

Black and white long exposure seascape

Seascape

What does any of this have to do with buses?

On the face of it, not a lot.

I’ve never been to Helsinki and I’ve certainly never seen its bus station, but I’m more familiar with it than any other Scandinavian transportation hub as a result of a lecture given by Amo Rafael Minkkinen a number of years ago.  He was talking about the creative process, the development of one’s own style as a photographer and how it could be compared to taking a journey from Helsinki’s central bus station. You can read a transcript about the Helsinki Bus Station Theory here.  (It’s worth taking the time, I think.)

Old Helsinki main bus terminal

Google tells me this is the old Helsinki bus station… (Courtesy of JIP at English Wikipedia [CC BY-SA 3.0])

In a nutshell, he argued that you will spend years making photographs that look like the work of others, but eventually (and here’s where the bus analogy punchline arrives) your personal route will start to diverge from these others as the journey progresses and your own style will start to become distinct from those around you.  The trick is to stay on the bus and see the journey through.  Going back to the bus station and starting again on another route to see if that offers a better option will just waste precious time and end up leaving you no further forward than before – just on a different route.

This resonated with me at the time, being inspired by the work of photographers like John Davies, Fay Godwin, John Blakemore, Igor Svibilsky and many others while I tried to work out what sort of photographs I wanted to make.  However, I’ve recently found myself reflecting on it in the context of writing my blog and how the focus of my interest in pens, paper and ink has changed with time, practice and seeing what interests other people.

Do I stick with what I’m doing?

Should I follow what I see going on elsewhere?

Sure, at times I’ve followed the same routes as other people, even jumping on the occasional bandwagon.  What I think I’ve learnt along the way is that you should trust your own judgement, follow what interests you and learn from your experiences as you go.  I’ve also learnt that my list of favourite pens (owned or aspirational) or inks and, to a lesser extent, paper now looks nothing like it did a couple of years ago.  Also, I’m fairly confident that my list will almost certainly never entirely match anyone else’s. At first glance there might be similarities, but look at the detail and you’ll start to see the differences.  That’s one of the wonders of this hobby and the wonderfully diverse group of people out there who practice it.

So, whatever your creative endeavour, whether it be one that you do in private or share publicly, you’ll get where you’re going eventually.  Stick with it and try to enjoy the ride.

As Minkkinen himself said – “Stay on the bus.  Stay on the f*cking bus!”

A Helsinki bus

A Helsinki bus. Consider staying on it… (Courtesy of AleWi [CC0])

Sailor Shikiori Rikyucha Ink Review

Sailor Rikyucha ink doodle

In case you were in any doubt about which ink I’m talking about

Rikyucha (Green Tea Brown) is part of Sailor’s Shikiori (Four Seasons) range of inks.  Although it is a new ink to me, a bit of research suggests it was part of the Sailor line-up for a while, before disappearing to wherever discontinued inks go.  The translation of Rikyucha is a good one in terms of describing what is quite a complex ink.  It’s also a more palatable descriptor than some that might be applied to it.  Any resemblance between this ink and something that you might find lurking at the bottom of a pond is, of course, entirely coincidental…

Lookalikes

My interest in inks of this colour started with a couple of Diamine inks – Safari and Salamander.  While I’ve liked the colour of these inks, I’ve found them a little dry for my liking.  In a quest for something more to my liking I tried Robert Oster Bronze.  I love the colour of this ink, but again it’s a bit too dry for me.

Comparison swatches

Can you pick out the culprit from this lineup?

Close-up of ink swatches

The same swatches in closer detail

As you might expect from an ink made by Sailor, Rikyucha is a well-behaved, low maintenance ink.  That said, I suspect it’s the kind of colour that will polarise opinions.  I may well be biased, but it was appealing enough to make me buy a bottle.  As I’ve used it in anger I’ve grown increasingly fond of it.

As well as these basic properties, Rikyucha has one or two extra tricks up its sleeve.  The most on noticeable thing is that it looks dark green with a slight hint of blue while wet, but dries to a much browner shade.  I tried to capture this difference, but failed miserably so you’ll have to take my word for it.

Sailor Rikyucha writing sample

Some of my favourite literary villains and yet another chance to flaunt my awful handwriting

On top of the colour shift, there’s a cheeky bit of sheen thrown into the package.  Like a number of other Sailor inks I’ve used, it’s not the raison d’etre of this ink, but it’s a nice addition without dominating proceedings.  I used some ink splats to highlight this, but (on the right paper) broader, wetter nibs will also show this off.

Rikyucha ink splats and sheen

The obligatory ink splats to highlight the sheen

As befits an ink with these properties, its make up is a bit complicated and unexpected.  Some simple kitchen chromatography shows a range of colours.  I certainly wasn’t expecting the blue component…

Sailor Rikyucha chromatography

There’s more to Rikyucha than meets the eye

Economics

This is one of the first bottles of Sailor ink that I’ve bought in the new, smaller bottles that are replacing the old 50ml ones.  I like the design of the bottles and I’m generally a fan of smaller ink bottles.  I already have more ink than I’m likely to get through in my lifetime, so not having to add another 50ml to my list of guilty excess is to be welcomed.  What is not so welcome is the big shift in the unit cost of Sailor inks.  In the UK, a 50ml bottle of the old Sailor Jentle Four Seasons ink cost in the order of £16-20, which I thought was pretty good value for money for the quality of the ink.

The new 20ml bottles, however pretty they might be, weigh in at around £11 or £12, which shifts the cost from around 35p per ml to approximately 60p per ml.  Much as I love Sailor inks, this will certainly make me a little more selective about future purchases.

Sailor Shikiori Rikyucha box and bottle

Is it small or just very far away?


Conclusion

Overall I really like this ink.  I like the new packaging and bottles and I definitely like how Rikyucha behaves and how it looks on the page.  The colour shift as the ink dries and the sheen add to the interest, so if the colour of this ink appeals I’d recommend checking it out.  The only fly in the ointment is the pricing.  To be frank, the jump in price per ml seems excessive to me.  I get that smaller volumes will be relatively more expensive, but this is going a bit far.  That said, none of the other inks I’ve tried in this corner of the colour chart have worked nearly so well for me, so I’m prepared to live with the relatively high price.

Fountain Pen Review: Faber Castell Loom

The makings of this review have been hanging around for the best part of a year.  I even started a draft back in April of last year, but couldn’t find the right approach.  Fast forward 8 months or so and a comment on Rupert Arzeian’s excellent blog and I figure it’s time to have another go.  After something of a fallow period in terms of posts, I had to start somewhere.  So here it is, a review of the Faber-Castell Loom fountain pen.  Well, 2 of them, actually.

Overview

F-C Loom

Looming on the horizon after 8 months…

For a company with such a long history of making writing instruments, it’s always struck me that the design of a lot of Faber-Castell’s fountain pens is remarkably contemporary.  So it is with the Loom.  Its clean lines and distinctive shape make for an interesting starting point.  I’d admired the Loom for a while before I bought my first one.  Owning that one didn’t deter me and I’ve since bought a second.  My first Loom came in a matt silver finish, but these don’t seem to be very widely available any more.  The second came in a gloss silver finish, which I think looks more stylish.  There are also some options in a gunmetal finish, although these command a premium on price.

The Loom is quite widely available from the usual sources.  In UK pricing terms, the gunmetal version costs around £40, with the silver version coming in at around £30.

A Sense of Proportion

The Loom is not overly long, but looks stocky.  The constant diameter of the barrel coupled with the limited taper of the section make it feel quite chunky.  The photos below show some comparisons.

Pen size comparison

Capped size comparison.  L-R: Sailor Pro Gear Earth, Faber-Castell Loom, Faber-Castell Loom, Pelikan M400 White Tortoise, Pelikan M600 Vibrant Orange, Platinum 3776 Kumpoo. (Polar bear not to scale)

Pen size comparison

Uncapped size comparison…

Some Details

If the Loom was a more high end pen, the barrel might be milled from a single rod of metal.  Instead, it comes as a plastic-lined cylinder with a concave plug at the end. It’s all well finished and it gets the job done, but it does look a little unusual.  The plug looks a little less attractive  on the matt version compared to the gloss.  Luckily the pen posts easily and without any negative effects on balance so you can at least cover this up whilst writing.

Once you’ve decided on finish, the only other option to consider is what colour you’d like the cap.  When I bought my orange one there was quite a wide range of colours, but this seems to have reduced over the past couple of years with more of a focus on muted and pastel shades.  Not as much fun, but there are still options.  The lack of threads is a bit of a giveaway – the cap is a snap on, rather than screw-on and it does so with a very satisfying ‘click’.  You’re left in absolutely no doubt when the Loom is safely capped.

Faber-Castell Loom cap detail

If the cap fits…

The cap is engraved with the company name and logo down one ‘side’ (relative to the clip).  There’s no separate finial, but the part of the clip where it fits into the cap is engraved with the Faber-Castell logo as well.  As seems to be the case with a number of Faber-Castell pens, the Loom’s clip is a fully-functional and substantial affair.

F-C Loom cap detail

Cap detail

The cap is slightly bulbous in shape.  From its widest point at mid-height, it tapers slightly towards the base and slightly more markedly towards its tip.  I find the profile easy on the eye, and when the pen is capped it breaks up what would otherwise be a very angular profile to the Loom.

I mentioned the contemporary look of several Faber-Castell fountain pens, and one area the company seems to have gone its own way on is in the design of the section.  On first reading, cylindrical and slightly tapered sounds pretty conventional, but I haven’t  come across a design quite like this before.  On both of my Looms, the finish of the section matches that of the barrel so there’s no concession there to promote grip.  There’s also a slightly disconcerting lack of any flaring to stop your fingers sliding off the end of the section and onto the nib.  The only feature to help keep your hand where it should be is a series of 5 rings that act as ridges to provide something to grip.

F-C Loom section

The section won’t be to everyone’s taste

This works perfectly well in terms of stopping the Loom from sliding out of your grasp.  Even so, I do find the section a bit ‘squirrely’.  It has a slight tendency to try and rotate in your grip.  That persists with use, but you do get used to it and everything settles down.  I wrote the first draft of this review by hand with the Loom (and in 1 sitting) and it was fine.  I don’t find that I have to grip the section any more tightly than normal and I haven’t experienced any noticeable fatigue as a result.

The Sharp End

I’ve spent a bit of time now highlighting some of the Loom’s quirks and (ahem) features, but it does have a trick up its metaphorical sleeve – the nib.

Faber-Castell has a reputation for high quality steel nibs, and the units I’ve got on my Looms are crackers.  The nib is a #5 in size and suits the proportions of the Loom well.  I think it’s the same as used in a number of other Faber-Castell pens, including the Ondoro and eMotion.  Absence of a breather hole and a stippled finish in the form of a chevron add to the attraction, but at the end of the day it’s the performance that counts.


F-C Loom nib

Nib details

Nib detail

The nib housing protrudes a bit from the section…

I have a fine and a broad nib and both have worked flawlessly out of the box.  Ink flow is good, even with drier inks.  Both nibs give feedback on a range of papers, but it’s not too intrusive.

Writing samples

The obligatory writing samples

The Loom takes either an international cartridge or converter, meaning there is a wide range of ink options available.  As a slight note of caution, I’ve found that not all international converters fit equally well, so a bit of trial and error might be needed if you’re thinking of re-purposing another brand of converter.

Conclusion

I can see the Faber-Castell Loom being a pen that divides opinions.  I’ve highlighted a number of ‘quirks’ in the design and execution of the Loom.  The overall design might not appeal to everyone.  Similarly the shape of the section won’t be everyone’s cup of tea.  While none of them are likely to be killer blows in isolation, I could see how they might start to accumulate in the ‘deficit’ column of any evaluation of the Loom.

My take is that the overall design and feel of the pen, coupled with the quality of the nibs, make the Loom worth having.  To reject it on the grounds of some kind of cumulative scoring system would be rather harsh.

Don’t smash the Loom! (As Ned Ludd almost certainly didn’t say.)

Initial thoughts – my first Pelikan

I was going to call this a review, but since it lacks the sort of details that you might expect to find in a review, I’ve gone with something more mundane.

If you have any interest in fountain pens, you’ll have heard of Pelikan.  Some people collect Pelikans to the extent of obsession, owning every regular and limited edition going.  There’s even a collective noun for them – a flock.  (If you want chapter and verse on Pelikan pens, you could do worse than to start with the excellent Pelikans Perch).  I could always see why people liked them – a strong pedigree, well made, (mainly) gold-nibbed and piston filled, but for me something about them never quite clicked.

That’s changed a little in that I now own a Pelikan – an M400 White Tortoise.  Even that wasn’t entirely straightforward…

Pelikan M400 White Tortoise

The seldom spotted White Tortoise

On the one hand, photos of the green tortoiseshell that makes up most of the barrel of this pen were intriguing.  On the other hand, “everyone” (whoever they are) says that the M400 is too small and any right-thinking person would start at the (larger) M600.  One of the reasons for going to the Bristol pen show back in February of this year was to be hands on and get my head round the relative sizing of Pelikans.

Green tortoiseshell detail

That tortoiseshell…

All of this combined to confirm that, despite the looks of the White Tortoise, I shouldn’t buy it.  It was too small and didn’t look right in my hand.

OK…

Fair enough…

Decision made…

Since I didn’t much like any of the options in the M600 range at the time either, it left me concluding that about the only Pelikan I could consider buying was the M805 Stresemann.  Perfectly rational, but the price meant that it got put on the long list of pens to buy one day, rather than anytime soon.

So far, so logical.  But despite this, I couldn’t quite get the White Tortoise out of my head.  Fast forward to the summer of this year and an unfortunate combination of circumstances trampled logic into the dirt, turned and blew a raspberry in its dusty face and led me to buying the same said White Tortoise.  The lure for this particular ambush was set out by Anthony from UK Fountain Pens, who posted a photo on Instagram of a White Tortoise he’d just bought.  The trap was then sprung by Cult Pens, who had the nerve to offer 10% off an already competitive price and throw in a free Pelikan case.

My already non-ferrous will collapsed at this and I gave in to the inevitable and pushed the button.

Pelikan White Tortoise plus case

It was hard enough resisting the pen, the prospect of a free case tipped the balance…

The one thing that photos of pens and even picking them up un-inked can’t tell you is how they will write, and this for me has been the revelation with the White Tortoise.  I have lots of pens that give me pleasure to use, but I own a far smaller number that you feel just “want” to write.  My new Pelikan is one such pen.  The nib is unbelievably smooth, inks flow ridiculously well and actually it feels pretty good in the hand.

Pelikan M400 nib detail

View from the sharp end

My first outing with it involved inking with Pilot Iroshizuku Kon-peki, a long-time favourite both for colour and for ease of use.  I was wary of anything that might stain the barrel and ruin the looks of the White Tortoise, but Kon-peki has always proved easy to clean out.  This highlighted one “issue”.  With an ink that flows well, output from the nib is so high that the fine nib I bought looked more like a generous medium.  Not unmanageable, but not quite what I wanted.  I’ve since tried some “drier” inks and things are definitely more to my liking with this change.

It still tests the definition of what I’d call ‘fine’, but I can happily live with that.

Sample text

The obligatory writing example


I was reflecting recently on one of the first posts I wrote on this blog about the Conklin Duragraph and how I realised that initial troubles I had with that pen were due to the poor flow of the ink I was using – Diamine Silver Fox.  Now I haven’t touched this ink since that fateful trial, but I wondered whether my new Pelikan could be elevated to the status of miracle worker and get something useful from Silver Fox.  It turns out not, but I won’t hold it against the White Tortoise and Silver Fox will just have to forever remain on the inky equivalent of the naughty step.

Back to the White Tortoise.  Since I’ve had it, only a couple of days have gone by when it hasn’t been inked and it continues to be a source of joy and pleasure.  It’s made me realise that Pelikan might know something about pens after all and “made” me put my name on the waiting list for the soon-to-be-released M600 Vibrant Orange.  That is an M600 I could really like.

Conclusion

I suppose I’m meant to draw some kind of conclusion out of this.  Aside from the obvious “Pelikan pens are not what I thought they were”, there’s the wider realisation that “monkey see, monkey want” is not all there is to this wonderful world of fountain pens and all that goes with them.   Sometimes a longer courtship, coupled with denial and, ultimately, ignorance of reasoned argument is required to make you really appreciate what’s in front of you.

Also, temptation from enablers and discounted prices are a wicked (interpret that how you will) combination.

Will that do?

Roll up! Roll up! – Rickshaw Bagworks Hemingway Graphic Pen Roll

If you’re a fountain pen collector/hoarder like me, the question of how to keep them safe can become a bit of an issue.  One potential solution is the humble pen wrap/roll.  Enter the Hemingway from Rickshaw Bagworks.

Hemingway Graphic Pen Roll

Give me a wave

Is it a wrap?  Is it a roll?  Both terms seem to get used for objects of this sort.  In using the Hemingway, there are elements of both wrapping and rolling.  So, like a sightless Cervid, I have no idea.  Rickshaw call the Hemingway a pen roll, so that’s good enough for me.  Pen roll it is.

The Origin Story

The Hemingway, like Rickshaw’s other products is made at their workshop in San Francisco.  It comes in two flavours – Standard and Graphic.  The Standard can be had in a range of colours and retails at $39.  You can customise the finish for an extra $10.  The Graphic also comes in at $49, and you can now have all manner of finishes.  The graphic started out as a series of rolls themed around oriental dragon designs, which Mark from Rickshaw posted on Instagram a while back.  Inspired by this, I asked whether it would be possible to produce a roll based on the famous Hokusai woodblock print of the Great Wave off Kanagawa.

As it turned out, the answer was – “yes”.  Within 2 days of posing the question on Instagram, the fabric had been printed, cut and a prototype stitched.  Pretty impressive.

Outer of Hemingway Graphic pen roll

Block and roll.  Hokusai’s Great Wave off Kanagawa – woodblock meets pen roll.

I placed my order and, within a few days, my Hemingway was en route.  Not surprisingly, the longest wait was for various postal organisations to get their act together and move it from the West Coast of the US to the UK.  Eventually it landed safe and sound in the UK and, once I’d paid over the ransome to the Royal Mail to get my goods released, it was duly delivered.

Construction

The cutting and stitching are of high quality and everything is well finished.  The printed fabric is described as a polyester canvas.  It feels a slightly smoother than regular cordura , but there’s nothing to suggest that it lacks the necessary robustness to look after your precious pens.  Rickshaw call their lining material “Royal Plush” and it lives up to the name, being incredibly soft and sumptuous.  Mine comes in dark blue, which matches up nicely with the indigo and Prussian Blue used in the Great Wave.  As you might hope,  the quality of the image itself is also very good.

1BDD45C5-ADE2-4563-B321-29F01E8A7C3B

Double vision

In use

The Hemingway does all the things you’d expect a pen roll to do.  As with many other pen rolls, it holds 6 pens, although you can get versions that hold 8, 10 or 12 pens.  I like the idea of a roll that can hold more pens, but I can imagine that this might become a bit bulky and cumbersome.  The largest pen I own is a Conklin All American, and the Hemingway swallowed this with room to spare.  How much bigger you can go before things get a little too snug – I can’t really say for sure.

1E6D5027-056D-49E0-8DA4-93C149C3AB49

In all their pampered glory

64D624D0-3C00-465E-A926-7642DC764F71

Gratuitous detail of the plush lining


Rolled up Hemingway

It’s a wrap? On a roll?

Once you’ve finished your wrapping and rolling, the Hemingway is secured by a loop of elastic cord and cord lock which will allow you to cinch the cord up if you need to.  Rickshaw claim that the Hemingway is machine washable, which is handy if things go a bit wrong.  I’m less certain how colour-fast the fabrics are and what you’d end up with after letting your washing machine loose on this.  Still, it’s nice to have as back-up.

Conclusion

If this was “just” a regular Rickshaw Hemingway, I’d be seriously impressed.  Whatever the finish, it’s well made, does its job effectively and the plush lining material is truly sumptuous.  You could rest assured that your pens were being suitably pampered as you went about your business.  That said, I feel a much stronger degree of connection towards this one, because an element of it was my idea.  As an acknowledgement of this, Mark was kind enought to include a dragon pen sleeve in the package at no extra cost.

Hats off to Mark and the team at Rickshaw for both a great product and for their responsiveness.  One of the things that impresses me about the fountain pen world is that there are so many companies willing to engage with their customers and go that bit further.  I definitely put Rickshaw Bagworks in this category.  Based on my experience as a customer and with the range of cool designs they now have on offer, I suspect this may not be the last Hemingway Graphic that I buy.

Ink review – Krishna ink round up

Overview

Krishna inks are made in a place called Palakkad in Kerala, India and are the brainchild of a Dr Sreekumar.  Their trademark features are some interesting names and some vivid colours.  There is a reasonably large (and growing) line-up and they are becoming more widely available outside India.

Presentation-wise they come in 20ml glass bottles, which are perfectly functional but which won’t win any design awards.  Packaging is similarly, how shall I put this, simple.

Simple packaging

Prize-winning packaging? Not really

Given that many of the ones I’ve tried are a little (ahem) flamboyant and may not always be suitable for everyday use, the relatively small size makes them quite an attractive proposition.  It also makes it easy to justify buying multiple inks, which is how I’ve ended up with 7 of them so far.

Jungle Volcano, Anokhi and Sumukhi

Rumble in the jungle

Silent Night Sky, Moonview, Snake Boat, Pencil

Bad Moon Rising

My overriding impression of Krishna inks so far is that they flow well and major on sheen.  The latter feature is subject to some confirmation bias in that I mainly chose inks that looked like they would sheen.  If you do like some sheen with your inks, you’ll find plenty to interest you in this range.

I’ve tried these inks over a number of weeks and in a variety of pens, but I’m just going to give a brief summary of each one.  I may get round to writing up more detailed reviews at some point, but given how long it’s taken me to pull this together, hopefully there’s enough here to whet appetites.

Moonview

Krishna Moonview

Krishna Moonview

I’ll kick things off with Moonview as it’s perhaps the easiest one to relate to other inks.  It is a rich blue ink with a strong red/pink sheen.  When I say strong sheen, what I mean is that Moonview is another sheen monster in the same vein as Diamine Skull and Roses or Organics Studio Nitrogen Royal Blue.  It flows well and I’d say it’s better behaved than OS Nitrogen Royal Blue, but you might not feel the need to add it to your collection if you already have a number of inks of this nature.

Anokhi

Krishna Anokhi

I’m not normally a big fan of purple inks, but I’ve quite enjoyed dabbling with this one.  On top of the purple base colour, there’s a hefty dose of green sheen to accompany it.

Snake Boat

Krishna Snake Boat

Aside from the fantastic name, which raises all sorts of questions about its meaning, Snake Boat has a sort of muddy purple as a base colour, but with a green sheen.  Again, there’s a really strong component of sheen, but the resultant combination is intriguing.   Of the two, I’d probably choose this one over Anokhi because it’s not such an obvious purple and the overall result appeals to me much more.

Sumukhi

Krishna Sumukhi

Sumukhi is a bright pink ink with some green sheen to further spice it up.  I’ll come clean – I have no idea why I picked this ink.  It’s definitely not a colour I would ever consider using for normal writing purposes.  I have used it in ink doodles, though, and it’s proved to be quite good fun for that.

Pencil

Krishna Pencil

This is a seemingly random name for an ink, and based on the swatch it seems a bit of a misnomer.  You can see the logic when the ink is wet as there is a grey look to it, but when dry the colour is more of a washed-out purple.  I was drawn to this ink as it reminded me of Robert Oster Summer Storm, an ink that I love the colour of.  My problem with Summer Storm is that I find it dry, verging on arid, and difficult to get on with.  Pencil, on the other hand, has worked well with both fine and broad nibs, giving quite varied properties.

Silent Night Sky

Silent Night Sky is perhaps the most mundane of the Krishna inks that I’ve tried.  So much so that I forgot to photograph it.  To help conjure up a mental image, it’s quite a rich purple, but it’s also quite ‘safe’ compared to some of its stable-mates with only a little sheen.  (That helped, didn’t it?). To be frank I haven’t felt anything resembling a strong urge to do much with this ink.

Jungle Volcano

Krishna Jungle Volcano

Perhaps saving the best until last, Jungle Volcano is ink making at its brilliantly bonkers best.  I seem to recall it got its name as a result of a competition on Instagram, but it’s a name that suits.  It has attracted quite a lot of attention and I have yet to read a review by anyone who didn’t like it.  I love orange inks, but often find them a bit too ‘thin’ in practice.  It may explain why I like darker, more complex inks like Monteverde Fireopal and Diamine Ancient Copper.  Jungle Volcano is a similarly complex orange ink, further enhanced by some crazy green sheen.  Using it is proper fun and brings a smile to your face. I can’t imagine a situation where it would be suitable for work purposes, but it’s an ink you may well find yourself looking for excuses to use.

All fun and games?

Well it is until someone loses an eye (see the book of the same name by Christopher Brookmyre for that one).  While my overriding experience of using Krishna inks has been a positive one, it hasn’t entirely been plain sailing.  It was probably too much to expect that such richly coloured and highly-sheening inks would be trouble-free and I have had a couple of issues.  I inked a TWSBI Eco with Sumukhi and it was fine in use, but when I came to clean the pen I found the feed to be quite gunked up and some staining in the barrel.  They good news is that the staining isn’t permanent, the bad news is that it took about 4 days of soaking and flushing with water to shift this.  I inked another Eco with Snake Boat, and although it has been fascinating to look at the ink while it has sloshed about in the pen, I fully anticipate another pain in the proverbial to clean this out when the time comes.


Jungle Volcano was also a little problematic.  I didn’t have any noticeable staining issues, but there was some nib creep (not uncommon with orange inks) and a bit of gunking up of the feed.  Again it took a bit of soaking to shift this.

In the interests of balance, I’ve also cleaned Moonview and Anokhi out of other pens, and these were pretty well behaved and straightforward by comparison.

Availability and pricing

Krishna inks are reasonably widely available.  In the UK, Izods seems to be the only supplier.  Unfortunately, I found their website so frustrating to use that I went a bit further afield, namely Belgium (Sakura Fountain Pen Gallery and Germany (Fountainfeder).  In both instances, the process was smooth and quick with excellent customer service (a hand-written note and some chocolate always helps).  I paid around €8 a bottle, plus shipping, on both occasions.  In the US, you can buy from Vanness at around $8 a bottle.

Summary

Of the 7 Krishna inks I’ve dabbled with, only Silent Night Sky hasn’t really hit the mark.  I’ll probably struggle to get through Sumukhi, but that’s a matter of colour preference.  The remainder will continue to get use.  In terms of favourites, Jungle Volcano is great fun, Moonview is probably the most ‘practical’, while Snake Boat and Pencil are probably the most complex and interesting.

Unexpected Discoveries

Serene Serendipity

Alongside the hours of meticulous research, cross-referencing reviews, finding the best price and generally procrastinating over purchases, I like the occasional moments of serendipitous joy that come with spur-of-the-moment purchases.  Sometimes it’s completely out of the blue, but more often than not it’s the little extra you add to your shopping cart as part of a bigger order.  After all, what’s the harm?

So it was with some recent ink purchases from Fountainfeder in Germany.  My main objective was getting my hands on a couple of German-only inks from Diamine – Skull and Roses and November Rain.

The process from order to delivery was smooth and the wait wasn’t too long.  As well as the ink, I got a nice, hand-written note and some chocolate – always welcome.  Both Skull and Roses and November Rain look interesting in a “sheen-turned-up-to-11” kind of way. Even so, they weren’t the stars of the show.  That honour goes to the contents of an unassuming sample vial – Super 5 Atlantic

From swatches on the web, it looks to be somewhere on the teal spectrum, but as it turns out, the online photos rather undersell Super 5 Atlantic (unless you love teal, of course).

I’m rediscovering my love for the sea in all sorts of ways at the moment, including inks that reflect its myriad colours.  As a result, this ink has struck a chord with me, helped by the massive clue in the name.  Not the Super 5 bit – that sounds like a posh upgrade from the Fantastic 4 (imagine it said in a plummy English accent) – I meant the Atlantic part.

Super 5 Atlantic ink swab

Avast ye swab!

Swabbed, you get a beautiful blue/green/grey kind of colour, which indeed evokes the ocean.  Used in anger, it has plenty of shading to add interest.  On 52 gsm Tomoe River paper, there’s some cheeky sheen.  In fact, there’s wall-to-wall sheen.  It’s a silvery sort of sheen, so it manages to be both subtle and extravagant at the same time.  The sheen doesn’t dominate though and the true colour of the ink shines through.

Super 5 Atlantic writing sample

All at sea

Of course, there are risks and potential pitfalls with these impulse purchases.  Failure to do any meaningful research meant that I didn’t pick up on the fact that it’s a permanent ink.  If I’d known this I might have picked a different pen to my ghostly Franklin-Christoph 45.  The cap has a habit of collecting ink spots that are hard to shift so I’m being a bit wary and handling the pen gingerly until I’ve written it dry.

At around €16 for 30ml, Super 5 Atlantic is not a cheap ink.  It doesn’t seem to be available in the UK, so shipping costs from Europe add to the challenge.  It’s such a beautiful colour though, that I didn’t hesitate and I should have a bottle in a few days.  I can easily see this becoming one of my favourite inks – high praise from someone who has the attention span of a gnat when it comes to sticking with one ink.

TWSBI Precision Fountain Pen Review

TWSBI Precision

The TWSBI Precision in all its glory

I seem to have bought another pen

The Precision is one of  TWSBI’s latest fountain pens and their first truly new model in a while.  I wasn’t going to buy one.  After all I have had 7 TWSBIs and didn’t need another one.  Also, I didn’t really have the spare cash.  As it turned out, I didn’t have the requisite willpower to resist temptation either.  So here I am with another TWSBI.  At least it’s not another demonstrator…

Which of course it isn’t.  If you’ve seen anything of TWSBI’s latest issue, you’ll know it’s an all-metal affair.  In keeping with other TWSBI fountain pens, it’s a piston filler but this time it’s a piston filler that’s channelling the spirit of a Rotring 600.

The clue is kind of in the name – it’s meant to line up with the Precision range of mechanical pencils and you can see some of the design features – like the clip – in both.  Other bits look like they may have started life in other parts of the TWSBI range.  I’ve never used or owned a TWSBI Classic, but just from looking at photos you can get a hint as to where inspiration for the design of the section and piston cap came from.

TWSBI Precision nib and section

The section is similar in profile to the TWSBI Classi

Living with the TWSBI Precision

On to the Precision and what the first few weeks of ownership have been like.

The Precision is a handsome looking pen – all brushed aluminium and chrome.  It comes in the same packaging as the Diamond and Vac pens, including a wrench and small pot of silicone grease if you’re feeling brave enough to dissemble and service your TWSBI.

The barrel and cap are hexagonal, complemented nicely by the circular finial and piston cap.  There’s a nice tapering and change of profile to blend the ends with the middle or the middle with the ends, depending on your point of view.

The barrel, cap and section are brushed aluminium and all finished in what some would call grey and marketing people would call gunmetal.  The finial and piston cap make a nice contrast in chrome.

TWSBI Precision cap details

If the cap fits…

TWSBI Precision piston cap detail

The piston cap, complete with O-rings

In use

The cap unscrews in less than one full turn.  There’s an O-ring (TWSBI do like their O-rings) at the top of the section where it joins the barrel, and this helps to ensure the cap is done up firmly.  This should help prevent the pen from drying out, but it also helps ensure that the facets of the cap and barrel line up when the pen is closed.  TWSBI had to get this right, otherwise the pen would look downright odd when the cap was done up.  It would also be embarrassingly imprecise (if you know what I mean).  You have to use a reasonable amount of force to do this, which makes me wonder how the O-ring will hold up to repeated compression over time.  No problems so far though…

TWSBI Precision cap and barrel aligned

It’s all lining up nicely…

When it comes to inking the pen, the piston mechanism works smoothly and does its job well.

Vital statistics

The quoted weight is 30 grammes, but around a third of that is accounted for by the cap.  This is a little more than for the Diamond 580, but it makes the barrel/section/nib combo proportionately heavier (20 grammes for the Precision vs 14 grammes for the Diamond 580).  It’s not outrageous, but it’s not a featherweight either.  Capped length is 137mm.  The barrel diameter is 12.8mm, while that of the section is 9.5mm.  I always struggle to visualise these sorts of numbers, so here’s what the TWSBI Precision looks like compared to some other pens…

TWSBI Precision size comparison

Can you identify the culprit from this line-up? (L-R – Lamy 2000, TWSBI Eco-T, TWSBI Diamond 580, TWSBI Precision, TWSBI Diamond Mini, ubiquitous Lamy Safari, Moonman M2)

The ergonomics of the Precision are quite interesting.  The hexagonal barrel is quite chunky, but sits comfortably in the hand.  The junction between the barrel and section is quite busy.  Here you’ll find the O-ring I talked about earlier, the thread for the cap and a relatively small ink window.  The section is cylindrical and quite slim compared to the barrel, but it doesn’t feel slippery due to the brushed finish.  The length of the section also means that the thread for the cap didn’t get in the way of my grip, so no comfort issues there.  However, the diameter of the section took a bit of getting used to.  Being a bit thinner than most of the other pens I own, I found myself gripping the section more firmly than usual.  This led to a bit of fatigue and discomfort for a while, but as I’ve got used to the pen, things seem to have settled down.  This could be a bit of an issue, though, if you like your pens on the chunky side.

TWSBI Precision section detail

That busy part of the section

The act of writing

There’s not much to say about the nib – but I mean that in a good way.  The Precision uses the same nib unit as you’ll find in the Diamond 580, and it performs as you would expect.  I’ve yet to have a problem with a TWSBI nib.  The fine nib I chose is a smooth writer with no hint of skipping or hard starts.

TWSBI Precision nib

It’s that nib again

For its first outing, I picked Diamine Graphite. It’s an ink that I like and which I think matches the pen quite nicely.

TWSBI Precision writing sample

There may be a lesson for us all in that first quote…

To round things up, I really like the design and execution of the TWSBI Precision.  It’s not a “pretty” pen, but it has a rugged charm that appeals to me.  The all metal construction makes for a substantial pen that manages to feel comfortable in the hand.  The weight and the narrow section may cause some comfort issues for longer writing sessions, but I’ve got a bit more used to this now.

Price-wise, the Precision is a bit more expensive than the Diamond 580 and a lot more expensive than  the Eco.  I got mine from Cult Pens for £71.  Prices from other UK vendors seem to be in the same ballpark.  US prices seem to be $80+.

If you’re looking to buy your first TWSBI, this is an expensive entry point and you might be better looking at something like the Eco (probably still my favourite TWSBI to write with).  If you know your TWSBIs, the Precision is an interesting addition to the stable and worth a look.  Owning one is a very different experience to other pens in the range, but that’s no bad thing…


Getting mixed up – into the Wild Blue Yonder

To begin at the beginning…

It started with something innocuous, as these things often do – a seemingly innocent purchase of a 30 ml bottle of Diamine ASA Blue.  At £2.35 it seemed rude not to.  But of course, that’s how they get you.  Added to the Mnemosyne 194 that I wanted, that almost got me to the £10 needed to qualify for free postage.  90p short, I needed something else…

…and that’s how I ended up with a bill for £45!

Enough about my lack of will power.  ASA Blue is great in its own right, carrying off  a passable impersonation of Pilot Iroshizuku Kon-peki at a fraction of the price.

TWSBI Precision and Diamine ASA Blue

Are you sitting comfortably?

While I was looking for write ups about this ink, I found an old thread on FPN where someone had mixed ASA Blue with Sapphire Blue in equal parts with interesting results.

So, I thought, how hard can it be and what’s the worst that can happen?  The answers are: ‘easy’ and ‘nothing untoward’.  No explosions, fires or gunky messes.  Instead, you get a really nice blue ink for your troubles.

Text from Under Milk Wood

Truly beginning at the beginning

Ink splats showing sheen

There’s sheen there if you look for it

What happens when you mix ASA Blue and Sapphire Blue

…something about a glass and a half?

Not an original idea and I can’t guarantee that I haven’t just made another ink from the Diamine range.  Either way, it was a bit of fun to try.  What I didn’t realise was that I was also demonstrating the pervasive and subliminal power of advertising.  It wasn’t until a couple of days after I’d done it that I realised why the image above looked kind of familiar.  Any resemblance to the logos and advertising imagery of a major UK chocolate manufacturer are entirely coincidental.  Honest.  No, really.

One thing that I do take issue with is the name.  The creator of this mix named it Asphire.  I see the logic and it gets a cheap laugh (or was that just me) but I can’t say I’m entirely impressed with the result.  I came up with was Wild Blue Yonder, but I’m open to suggestions.

Any thoughts?

Fountain pen review – Moonman M2

Moonman M2, Diamine Firefly

If you believed, they put a man on the moon

The Moonman M2 eyedropper fountain pen has been attracting quite a bit of interest recently, so I thought I’d join the bandwagon and find out what the fuss was about.  In trying to write this post, it has has turned into a bit of a hybrid of a review and an account of my first encounter with the world of eyedropper pens.  Please read on to find out how I got on with it.

My Chinese pen history

Chinese fountain pens are cheap and  widely available.  I own a number of them.  Aside from the amazingly bonkers Snake pen, made by Jinhao, most of mine are copies or derivatives of western pens.  Despite being fuelled by naive optimism, none of them have had much merit beyond being cheap to buy.  To give one example I brought a Baoer copy of a Starwalker.  The nib is reasonable enough, but sadly it’s more Mont Clonk than Mont Blanc, requiring a prodigious amount of plumber’s PTFE tape to make the section and barrel fit together.  Of the other Chinese pens that I own, all of them have needed a tweak or two to make work well.  At the prices you pay for these pens, you’re not going to get much in the way of quality control, but the flip side is that it’s a real lottery as to whether you get a good ‘un or a dud.

Thankfully that might be starting to change.  Frank Underwater has done some great work to highlight and introduce a new wave of Chinese pens that seem to be challenging stereotypes and injecting design and quality along the way.  The Moonman M2 is one such of these…

Eyedroppers

In case you didn’t already know it, an eyedropper is a pen that has no filling mechansim.  The barrel itself holds the ink, giving you a much higher ink capacity than a pen that fills by a piston or converter.  Ever since I came across the concept, I’ve been slightly unnerved about trying one.  Most seem to be conversions of standard fountain pens and depend on how well you can seal the joint between the section and barrel.  In the same vein, I’ve never understood why you’d want to do this with a pen where you can’t see the ink.  Fine if your pen is transparent or translucent, but otherwise, why bother?  Surely part of the point is to be able to see your ink of choice sloshing about (and know when it’s about to run dry)?

Is it a demonstrator?

Is it a demonstrator if there’s no filling mechanism to ‘demonstrate’?

I’m also very fickle and like to switch inks around on a regular basis.  Having  a huge ink capacity is not necessarily a bonus – it just means I have to write a lot more before I can change ink.

The ‘open-plan’ approach also means that while you can vastly increase ink capacity, failure of the seal means a lot of spilt ink!  Thankfully there seem to be more pens coming out that are intended to be eyedroppers from the outset.  As a result these come equiped for the purpose.  The Moonman M2 falls into this category, being made of transparent acrylic and set up to be an eyedropper from the outset.

On to the pen itself.

Presentation

In keeping with the clean and simple design of the pen, it comes with a perfectly presentable cardboard sleeve which sports the Moonman logo.  It contains a case made of similar plastic to the one that you get with a TWSBI Eco.  The box contains a striking red foam insert into which are cut slots for the pen and a glass eyedropper.  The pen fits snugly, meaning it can be a bit of a struggle to extract, but that’s no big deal.  If you’re anything like me, that’s the last time the pen will see the box anyway.

CE33C681-DA18-471E-8D0B-13738D69BA7B

moonman M2 in box

I was too keen to try the pen out and forgot the unboxing shot until after I’d filled the pen.  I hope you like red.

Size and shape

The Moonman M2 is basically a classic, pointy-ended torpedo shape.  Absence of a clip enhances the clean lines.  I’d call it medium-sized in terms of length and diameter, coming in at around 14cm long when capped and 13mm in diameter, with a screw cap (no clip).  Being made of plastic, it’s not too heavy.  My not-very-accurate kitchen scales tell me that it weighs in at 14 grammes.  To put it in a more real-world context, it’s similar in proportion to a Lamy 2000, just a lot pointier.

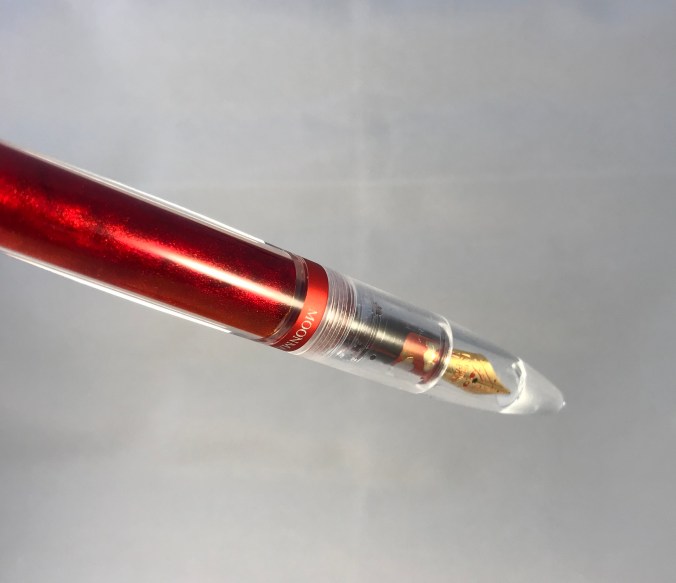
The nib is a fairly standard looking gold-esque #5, stamped with the immortal words “Iridium Point Germany”.  It’s probably meant to inspire confidence that you’re getting a certain level of quality, but it always makes me think someone is trying too hard to make the point.

Look and feel

I really like the clean, sleek looks of the M2.  Coupled with the way the acrylic has been milled, it looks very smart.  In place of finials and end caps you get tapered, polished acrylic, which catches the light nicely.

Moonman M2 catching the light

Catching some rays with Diamine Firefly

The other thing of note in the appearance of the Moonman M2 is a bright red anodised ring which bears the company’s name.  This won’t be to everyone’s taste, and some will argue that it interferes with the overall clean look of the pen.  I quite like it and certainly don’t find it offensive.  This marks the step-down from the barrel to the section.  Because of the overall proportions of the pen, this is quite moderate and the threads for the cap are also fairly unobtrusive.  I’ve had no issues of discomfort when holding the M2.

EFDF6FF8-E198-476C-A58F-294913E505FE

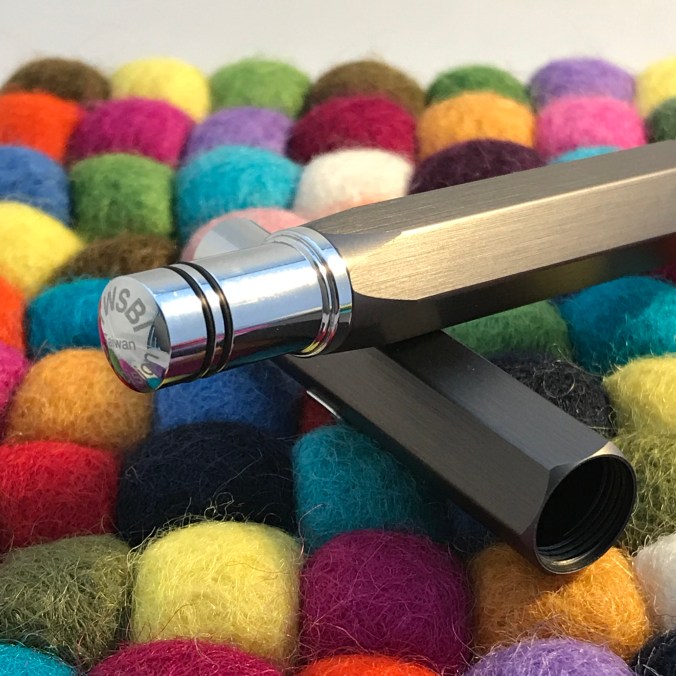
It’s a Moonman, in case you were wondering

Filling

Not surprisingly, filling this pen is pretty straightforward.  Put some ink in the barrel and that’s about it.  The key thing to remember is that everything needs to be done ‘upside down’ to avoid messy accidents and spills.  Keep things ‘nib up’ until the whole thing is assembled.  I haven’t tried the glass pipette (eyedropper) that came with the pen, preferring to use a syringe.  I’ve no reason to doubt that the eyedropper works, but I prefer the control you get with a syringe.

You can get a good 2.5ml of ink into this pen without any trouble, although there’s probably a little bit more headroom to be had.  The top of the section protrudes into the barrel when you assemble the pen, so if you’re over-enthusiastic with the filling you may find yourself re-acquainting yourself with the principles of Archimedes and with ink everywhere!  I’ve erred on the side of caution and managed to avoid that so far.

It’s probably the right point to talk about Leak Prevention System.  OK, there isn’t a system as such, but the Moonman M2 does come with two silicone O-rings installed to keep the ink where it’s meant to be.  One is around the top of the section, where it screws into the barrel and the other at the top of the nib unit.

The second O-ring is very fine, so you will need to keep a particularly close eye on it if you remove it for any reason.  I took it off mine and put it on a piece of kitchen paper (white, textured background – brilliant thinking).  I then spent several minutes trying to work out where I’d put it!

nib and section

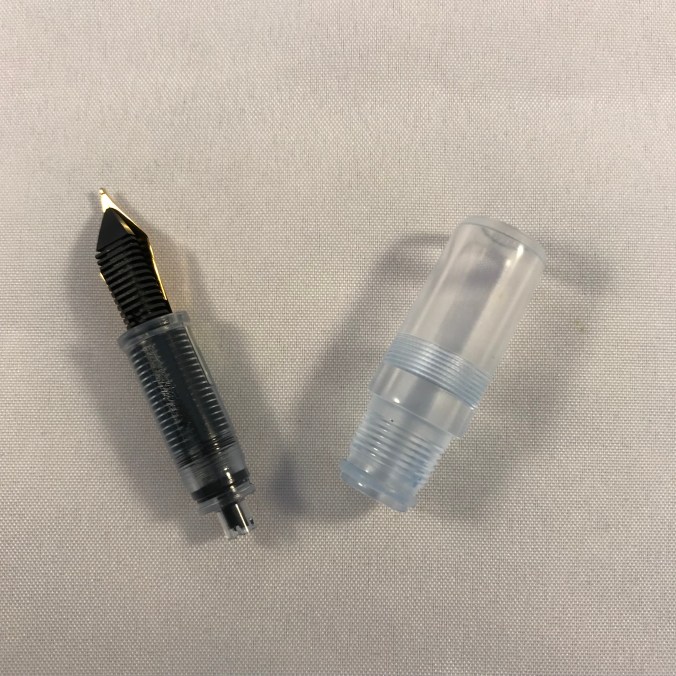
Spot the O-rings. (If I had remembered to draw in some arrows, they’d be easier to see!)

In use

I wasn’t certain whether the O-rings would be enough to seal the pen, so my first fill of the M2 was with water.  I left the pen nib-down overnight and was pleased to find that there was no hint of any leakage.  Buoyed up by this, I took the plunge and inked the M2 with Sailor Jentle Yama-dori.  It didn’t take much more than a couple of inversions and gravity to prime the feed and start the pen writing.

The Moonman M2 is available with two choices of nib size – 0.38 or 0.5mm.  These sizes equate roughly to extra fine or fine.  Given how much nib sizes vary in reality, I love the aspiration that nibs can be produced to this level of precision.

I chose the 0.5mm option and it’s a pretty solid fine.  It’s not the smoothest nib I’ve ever used, but I wouldn’t say mine was scratchy either.  I might try smoothing it out a little at some point, but for now I’m happy enough the way it is.  I’ve had no issues at all with skipping or hard starts, so all good there.  Opinion seems to be generally favourable  about the quality of the nibs on the M2, and my experience backs that up.

I’ve written a fair number of pages now on Tomoe River, Clairefontaine and TWSBI paper and the M2 has performed pretty well on all of them.

EFF114CE-292A-42A5-BAEA-00920DE6D3B9

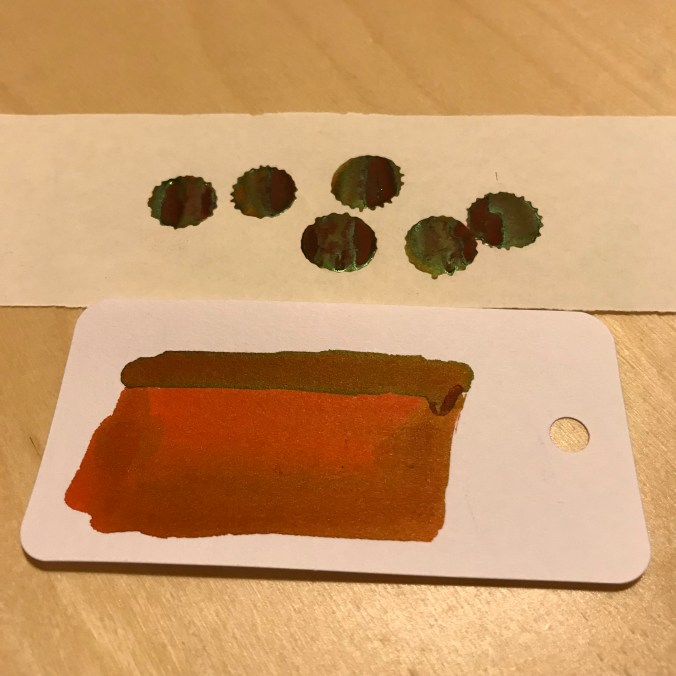
Testing the Moonman M2 – Sailor Jentle Yama-dori on Tomoe River

Cleaning

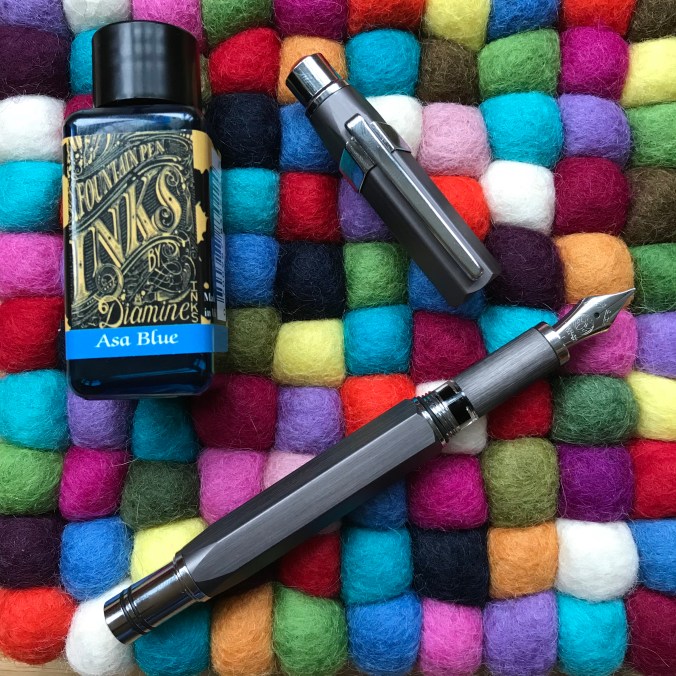
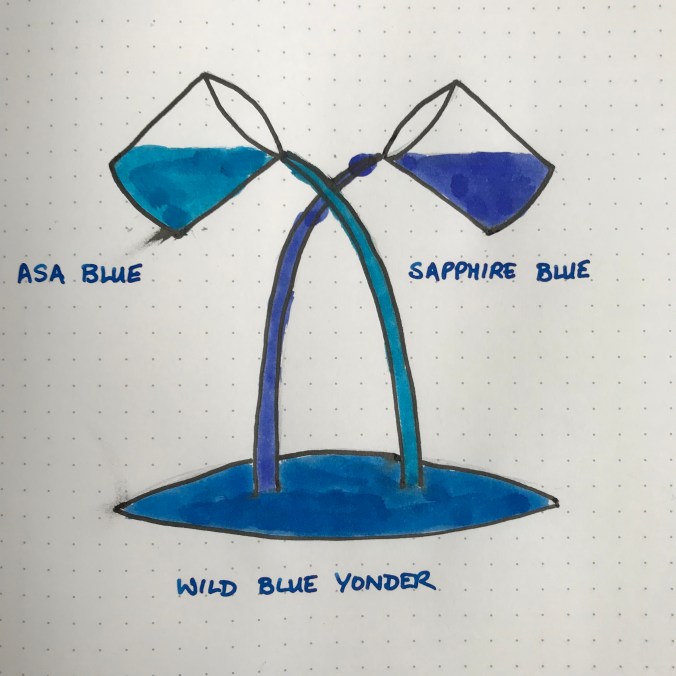
One potential concern about a pen like this is whether it will be easy to clean and how likely it is to stain.  So far, no problems.  I cleaned out the Yama-dori I first inked the M2 with and the barrel cleaned up with no issues at all.  The nib and feed took a bit more work, but came out with a clean bill of health.  A bulb syringe is a helpful tool for this.  Ditto the section, although the O-ring on this could have a tendency to trap ink, so might need particular attention.  I’ve since filled the M2 with Diamine Firefly and again the pen cleaned up after this without issue.  I’ve currently got it inked with Diamine ASA Blue and all looks good so far.

Price and availability

The M2 cost me £12.98 on eBay including shipping from China.  The US price is just shy of $16, so pretty comparable.  There are some being re-sold from the UK, but at around twice the price I paid.  Delivery took just over a week, which was more than acceptable.

Overall impressions

The Moonman M2 is a great pen in its own right, and wipes the floor with all the other Chinese pens I’ve tried.  Factor in the price and it’s an absolute bargain.  I love the design, materials and the quality of the finish.  As a first choice for an eyedropper I certainly could have done a lot worse.  I don’t really need a pen that can hold this much ink, but I’ve enjoyed being distracted by the sight of ink sloshing around in it.  The way the acrylic refracts/reflects light, really adds to the overall effect.  As a bonus, it’s certainly helped overcome my concerns about using eyedroppers.  All I have to do now is remember to handle it differently to all my other pens!

Gratuitous ink shot

Gratuitous ink shot